The Rig
The rig itself is a pop-up rig incorporating a D-section for free bait movement and a presentation of that bait directly above the hook masking it from above, making it harder for the carp to see, once the fish has picked it up there’s a 90% probability that it will make a good purchase in the carp’s mouth.
This rig is a pretty much a fish anywhere rig and can be used with multiple lead arrangements. Making this rig a great choice for a pop-up presentation and rig that will reset time after time if the carp do get away with it you have the confidence knowing it’s still going to be ready for the next hit.
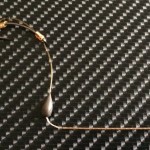
The choice of hook pattern used is essential to the rig mechanics to help form the D-section and to open the gape from the point of the hook to the edge of the bristle filament again maximising the hooking potential so with all this taken into consideration here is the rig featured below complete in all its glory.
The Rig
Components
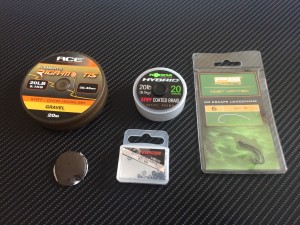
To tie this rig you will need the following components:-
A stiff coated braid of your preference.
A mugga style hook pattern size 6
Rig putty
A large or medium rig ring
Tools required to tie the rig.
Rig puller
Braid stripper
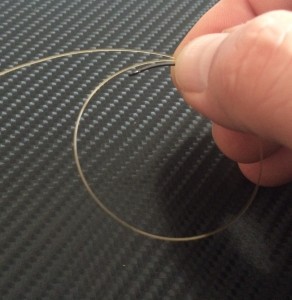
Step 1 Firstly take a section of bristle filament approximately 8 to 12 inches long or 200 to 300 mm. Take the hook form the packet and place it between the thumb and index finger with the hook eye to the left, then take your section of bristle filament and make a loop about 2 inches 50 mm in diameter.
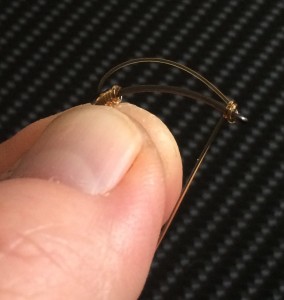
Step 2 Now lay this alongside the shank of the hook holding the middle of the two sections of the loop that cross over to form your loop, at this point hold both together firmly and whip the left hand side of the loop around the hook shank four times.
Step 3 Keeping the whipping knot you have now done nice and tight hold with the thumb and index finger so it doesn’t spring off and pull the left tag to secure it on the hooks shank, once you have done this place the whipping knot in the correct position and pull both tag ends to lock it down securely you have now completed the basis for the start of you D-section.
Step 4 Take your rig ring and slide this over the tag end that faces the hook point and the pass that tag end through the hook eye and perform a knotless knot seven turns is ample you know have your D-section, using a rig puller lock all this section down firmly into position this is the rig end complete. Place this to one side for a moment.
Step 5 Now take a section of your chosen stiff braided material and cut off 14 inches or 350 mm this makes it easier to work with and gives you a good choice of boom section length. Strip back a 5 inch or 125 mm to reveal the supple braid.
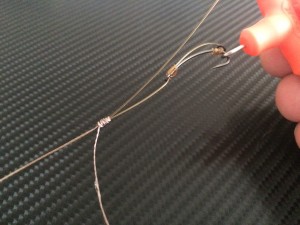
Step 6 Pick up your D-rig and make a fold or loop about 1.5 inches 30 mm away from the hook eye, once you have done this place it between you your thumb and index finger, we are now going to marge both these materials together.
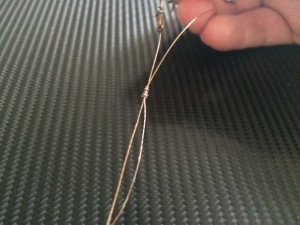
Take the supple end of the braid and pass it through the underside of the loop up to the stiff coating and pinch this together and hold it firmly. Whip up the bristle filament 7 times then hold the whipping you have just done at the top and whip it back down over those whippings 5 times, pass the tag end back through the loop from the top side to ensure it exits the same way you started this process.
Step 7 Once you have performed the above steps tease the Albright knot you have just made done to the loop section slowly at this point
moisten the knot before pulling the knot tightly using a rig puller on the hook end makes this easier to do you should now be left with really neat know were the materials are joined and have a small supple section no more than an 1 inch or 25 mm long.
Step 8 Your rig is now nearly complete take some time to check to rig is nice and neat at this stage you may need to move or adjust the D- section after joining the two materials together as it may have moved under tension, were the Albright Knot is this is where you’re going to place your putty to balance the rig it makes a good point for the putty to stick to and is at the correct place for the rig to work correctly.
Step 9
Now to complete the rig all you have to do is make a figure of 8 loop in the end at your required length, to complete the rig jus steam the stiff section straight and put a slight curve in the bristle filament and you’re ready to attach your bait to the rig.
Final Checks on the Bank.
Last but not least it’s always good practice to check over the rig you have made, steam the boom section until nice and straight and check the curve of you bristle filament is how you like it. Tie on your favourite pop-up to the rig ring and slide an anti-tangle sleeve over the loop end and attach this to your quick change swivel or quick link.
It’s always best to check your rig in the margins if possible to see the mechanics of the rig are working well, the balance of this rig is very important and when the rig travels through the water it wants to sink very slowly almost to the point of hardly sinking at all this way the rig will always work to its maximum potential serving two purposes, one it will always land on top of any debris on the lake bed and two it will fly back further and easier into the carps mouth hopefully getting a good hook hold resulting in less hook pulls.
Once you have fine-tuned this balance your ready to apply the rig over your baited area, be lucky I wish you every success, go bag a PB and smile….
Tight Lines


![FullSizeRender[1]](http://catchandrelease.co.uk/wp-content/uploads/2015/03/FullSizeRender12-284x300.jpg)
![FullSizeRender[1]](http://catchandrelease.co.uk/wp-content/uploads/2015/03/FullSizeRender1-285x300.jpg)
![FullSizeRender[2]](http://catchandrelease.co.uk/wp-content/uploads/2015/03/FullSizeRender2-285x300.jpg)
![FullSizeRender[1]](http://catchandrelease.co.uk/wp-content/uploads/2015/03/FullSizeRender11-300x225.jpg)